Glitter Projects for Photo Shoot

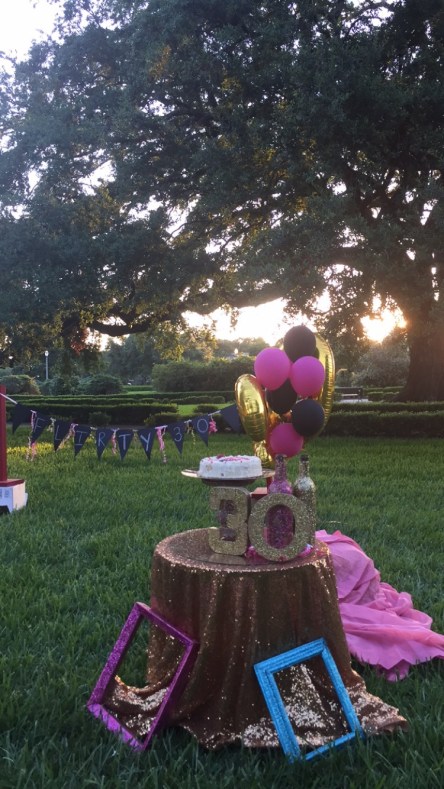
This week I got to play with lots of glitter doing some projects for my daughter’s photo shoot. She is doing a “Smash Cake” type session for someone celebrating their 30th birthday. Being a former Kindergarten teacher I’ve had a lot of experience with glitter but I just found out an easier way to do this without the messy glue. (Thanks to Pinterest) For these projects I sprayed on the Mod Podge clear acrylic sealer and then sprinkled the glitter. I did it in small sections because with the heat the spray doesn’t stay wet for long. One thing I learned after struggling with taking the labels off of the wine bottle was that I could have just left the labels on and glittered right over them and it would have covered it well enough.  On all the projects I sprayed a layer of the mod podge sealer on top to help keep the glitter on but I will say they still shed glitter a good bit when handled. I can’t wait to see how the pictures come out after tonight’s photo shoot. Here is a picture of how she set it up for the photo shoot.IMG_0493IMG_0490

Advertisement

Vintage Bread Box

image2I found an old vintage bread box that was all rusty and wanted to refurbish it and make it usable again.  I first cleaned it up and took the hardware off.  Then I painted it with Sherwin Williams white latex paint (duration) to give it a durable and washable service.  I purchased months ago a really nice stencil that says “The French Bakery” in French.  I was so excited to finally get a chance to use the stencil.

image1_collageIMG_0278_collage

Here is the bread box finished and in “Ginger’s Attic”.  It is nice, clean, and refurbished, ready to go in someone’s home and could be used for it’s original purpose – to store bread products in.  It even has a small vented area in the back of it.IMG_0282

IMG_0310

Old chest made into toy box

IMG_0186image1_collage

I recently made this toy box out of an old chest that we had at Country Kitchen.  Today I gave it to my grandchildren.  How can I resist those cute faces! They were excited and already putting it to use.

IMG_0106I do not have a before picture of it before my husband changed the front panel and the top panel by reversing them. There was a name engraved on the front and a wheat design etched on the top which I did not want to show.  This worked out great because I was able to use the original wood. The picture below shows the engraved name that is   now on the inside of the toy box which is now painted and is not even noticed.IMG_0133

IMG_0123_collageFirst I painted the entire piece Sherwin Williams Dover White, then painted the top, inside, and drawers light blue, the front panel and a strip around the side and back Sherwin Williams Indigo. I also painted black chalkboard paint on two small areas on each side.  I used stencils for the saying and designs on the front panel.  My husband attached a  strap to each side of the top to keep the top from flipping all the way back.  I put new hardware on the drawers which I think really made a big difference. I decided not to distress it . (I’m sure my grandkids will add that effect to it with time).  I put Polycrylic on the whole piece except for the two small areas that had chalkboard paint so it can be used as an actual chalkboard. I think my grandkids will enjoy it and I sure do love them to the Moon and Back just as the toy box says!      Update: Sad to say that this had to be thrown out after the flood of 2016 in Louisiana

IMG_0129_collageIMG_0174