Bench made from Bed frame

IMG_4470

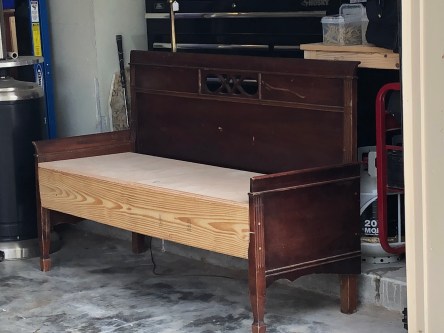
Finished Project – Bench made from Bed frame

My husband loves to make these benches out of a Headboard and Footboard. This one has such a nice design on the back and the blue color worked so well with it.  I haven’t done one in blue before and wasn’t sure I would like it.

IMG_4419

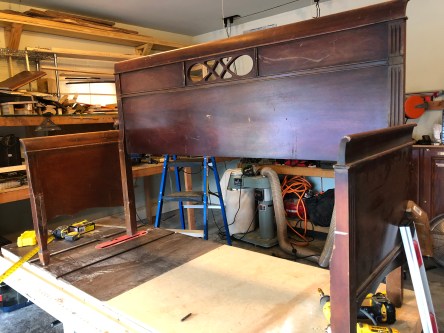
This is the beginning of constructing it. He cut the footboard in half to use for the sides.

IMG_4441

The bench seat was made out of plywood. 

staining Collage

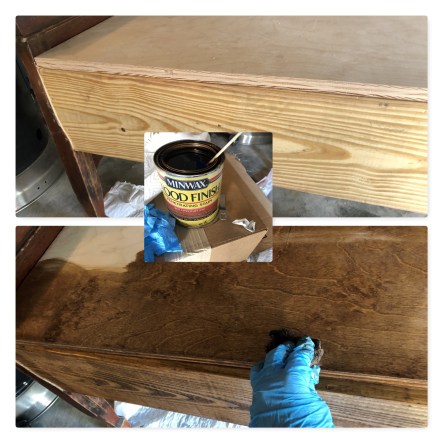
I stained the new wood with a dark stain. It didn’t matter if it matched the other wood since I’m painting it.  We filled in gaps and holes from screws with putty.

New Phototastic Collage

I bought the cushions from Lowe’s. I painted the first coat green which did go with the cushions but I just didn’t like that for the final color.

waxing and painting instructions Collage

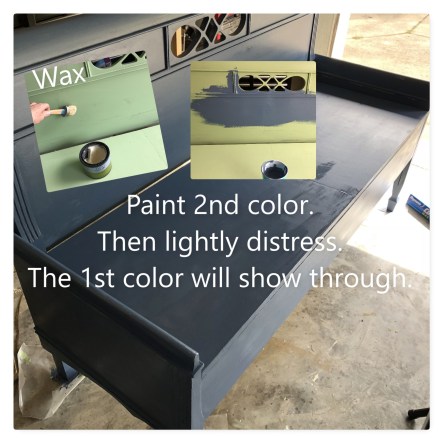
I put a light coat of the CeCe Caldwell’s clear wax, let it soak in and dry some and then painted the blue chalk paint.  Then I distressed it lightly with 150 grit sandpaper and then went over it with a fine sandpaper block to smooth it out. Then I put a few coats of varnish to seal it.

IMG_4468

I had it on my patio for a day or two and now it is for sale in my shop.  $250 (includes long pillow and cushions)


Advertisement

Holly Jolly Market at my Church

IMG_4811

Last year I participated in a market at my church in November. So last year’s goal was to get to some of those projects that I had been putting off and to clean out some of my craft stuff and hoarded items. Well I did just that! But I spent so much time making things that I didn’t take the time to do any posts on my website. So I just wanted to let people know why there were no post or current pictures added.  I was still doing lots of projects. Every now and then I would post pics on facebook but I took a break from the blogging and the use of my website. I’m now trying to get back into it so you’ll see many blogs in the next couple of weeks about what I’ve been up to.  My booth was a success at the market (my 1st time to do this) and I will be doing it again this November but won’t showcase as much. I had way too much stuff and that’s too much work to set up and break down. I have a shop at my restaurant so there is no need for me to go that overboard. The handcrafted angels on plaques are what sold the most so that will be what I will concentrate on. I will do a blog about my handcrafted angels soon. So keep checking in to see what’s happening with “Ginger’s Attic”.

Secretary Cabinet painted & distressed

IMG_0774

The finished Secretary/ cabinet.

IMG_0775

My daughter loves all the drawers for storing small household items and labeled each drawer using a chalk marker.  The back of each door is painted with chalk paint and can be used for memos.

IMG_5560

This pic shows the starting of the refurbishing. (Somehow missed getting the before pic)

This Secretary/ Cabinet belonged to my in-laws many years ago and had been kept in a garage for the last few years. It was not in good shape and very musty. I had to spend a good deal of time cleaning it and knew I would have to do some kind of stenciling to cover up the damaged places on the front of the cabinet doors.  My husband had to put a new frame around each cabinet door.

stenciling Collage

 I wanted it to look like a screen type pattern. It was not an easy task and it took a lot of detail work.  I had to hand paint some of the parts close to the edge.

drawer collage

This piece had a lot of drawers. I cleaned each one and painted both the drawers and the shelves that hold the drawers to freshen it up. I also lined each drawer with a piece of decorative felt.

IMG_6027

This was on Christmas Day when we gave it to our daughter and son in law.