 This vintage cane back barrel chair was given to me by a friend. It was a fun learning experience and I am excited about the way it turned out. The 1st step was to remove the upholstery and cording. One thing I’ve learned from previous projects is to keep the piece of fabric you take off to use as a pattern. I almost threw out the cording because I was planning on using a type of braid. I’m glad I didn’t because I realized how hard it was going to be to find just the right braid and to put it on without the staples showing. I ended up reusing the cord – just covering it with the material which was something I had never done before. This was definitely a Learn-as-you-go project. I cut the material strip to match the cord and stapled it on. Then I decided to sew with my sewing machine through the indention on top of the cord so I removed most of the staples and put pins instead. As you can imagine this was really hard because of the thickness of it and I didn’t know what kind of needle or stitching to use. My machine kept jamming and I broke two needles in the process. (I am not an experienced seamstress but at least I knew how to replace needles from past experiences. LOL! ) With a lot of patience and praying I was able to get the large cord that wrapped around the whole chair done on the machine and then did the small ones that wrapped around the legs by hand. My husband used his nail gun to attach the cording (most of the staples were hidden in the indention of the cords.) We did use hot glue in some places. The buttons (tacks) were done with a method I had done on a previous project. I used the original tacks and made a new button cover with the material and hot glued the new button cover onto the original tack. Sorry I forgot to get pics of the buttons on the chair but they came out great. The chair was painted, before I did the upholstery, one of my favorite gold colors. The fabric I used had cotton batting with it and I did have to sew it together which was also something new for me. My sisters are avid quilters – (not my thing) so I just did the best I could. I found this cool gold pillow with beads to put with it and now it is in my shop.

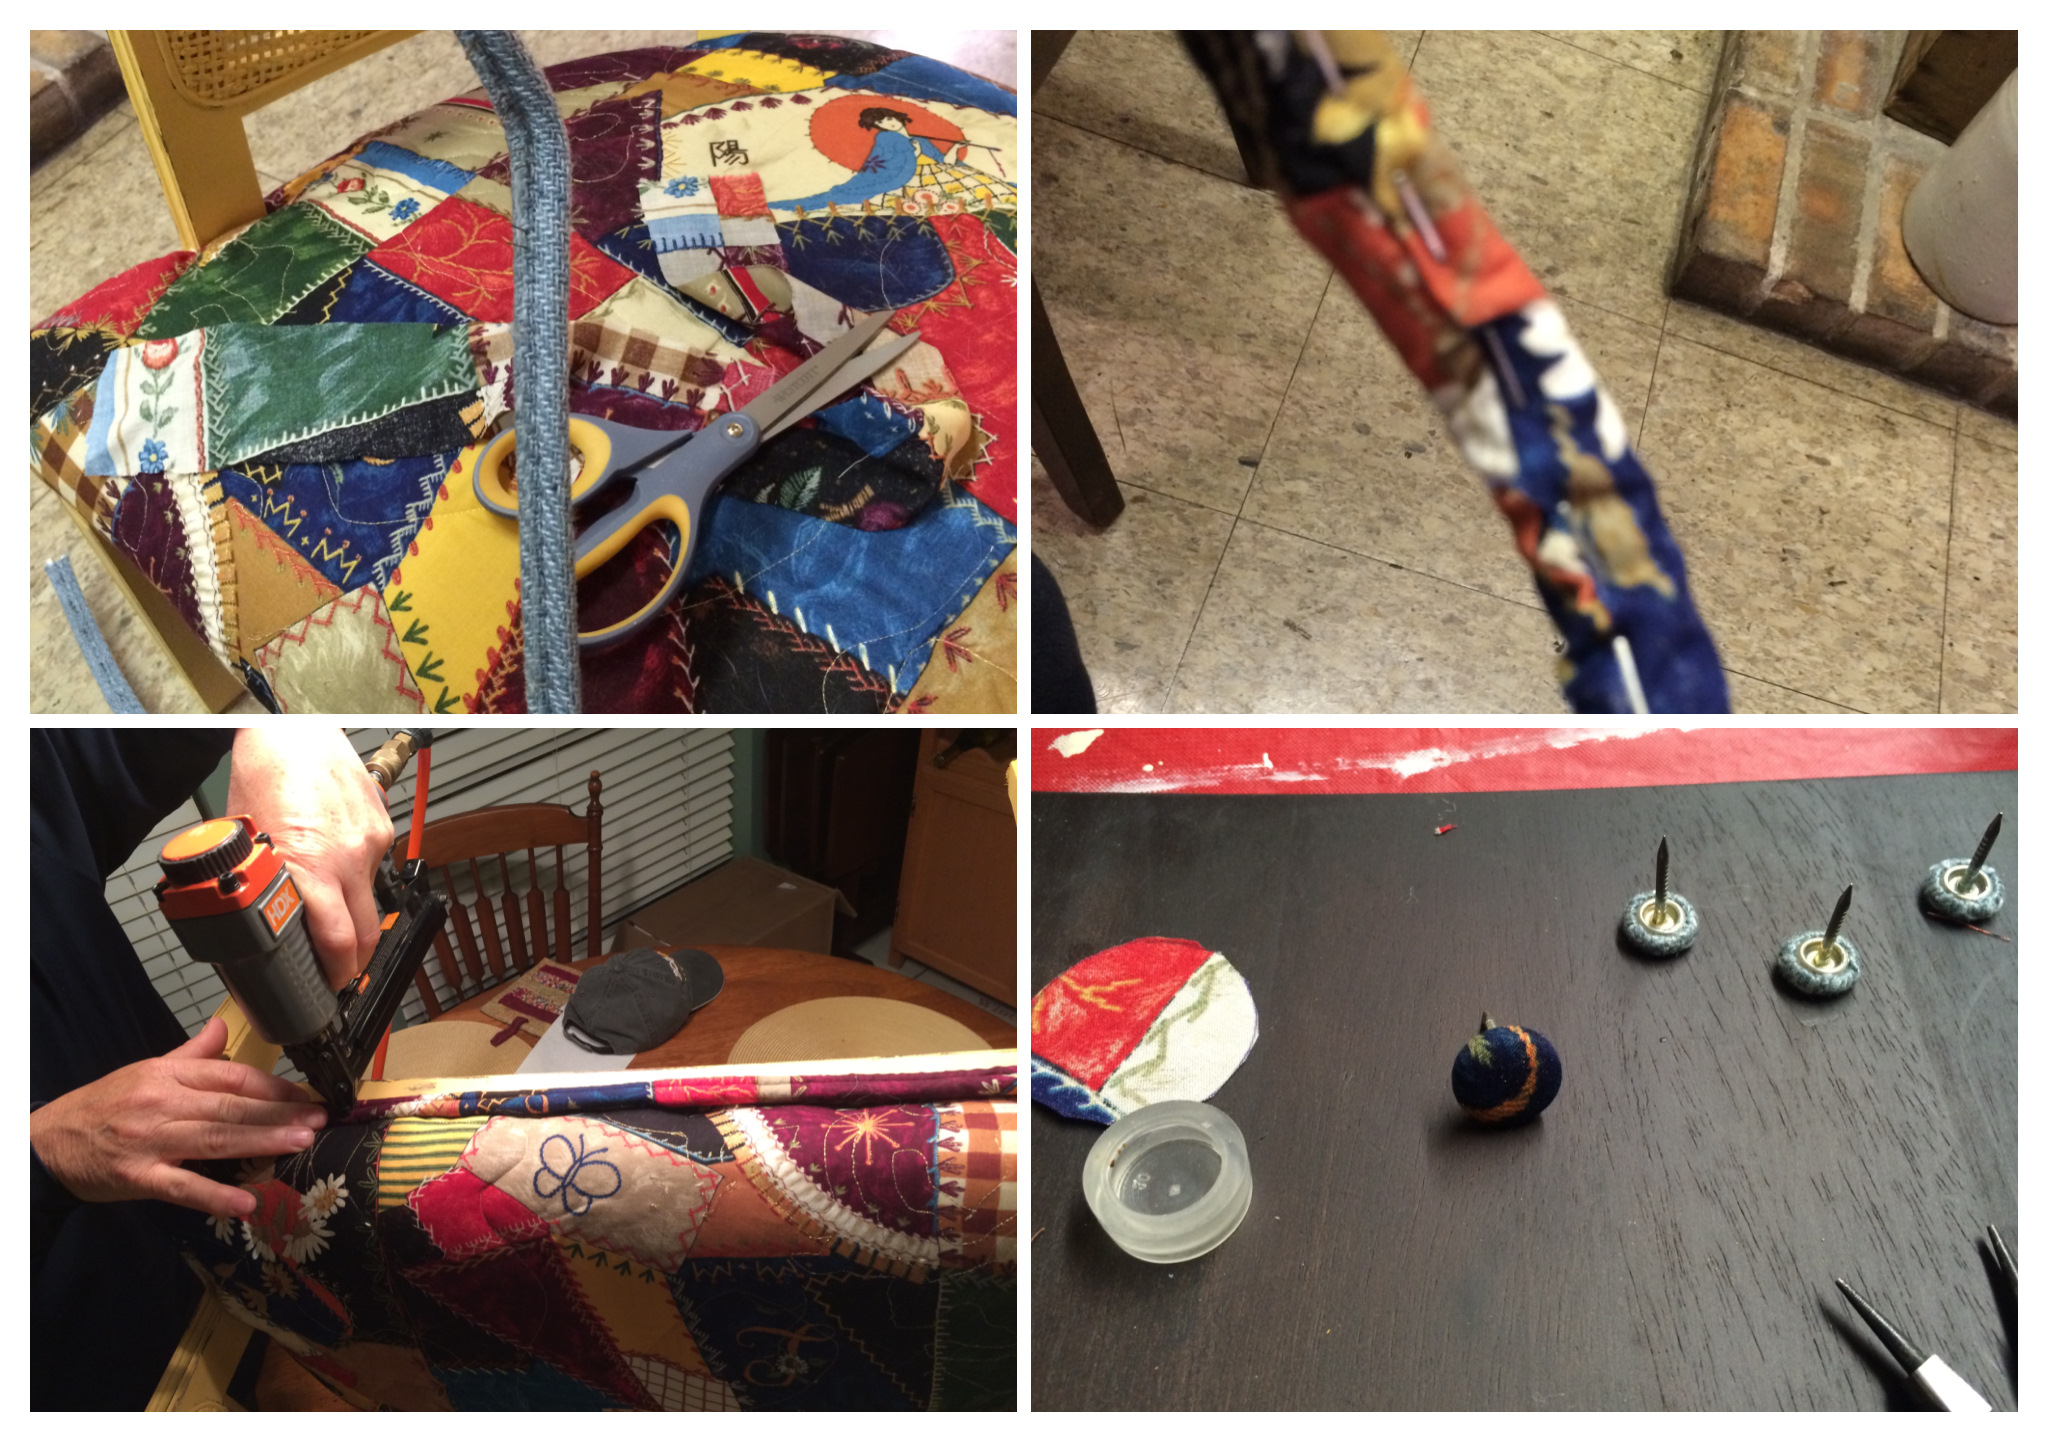
 This shows the stages of the upholstery. I was surprised how nice the covering was under the blue material. I already had my plan of making it a bright color and the fabric picked out so even though it was in good shape I still went ahead with my original plan. I’m glad I did because it will brighten up a room for sure!
